
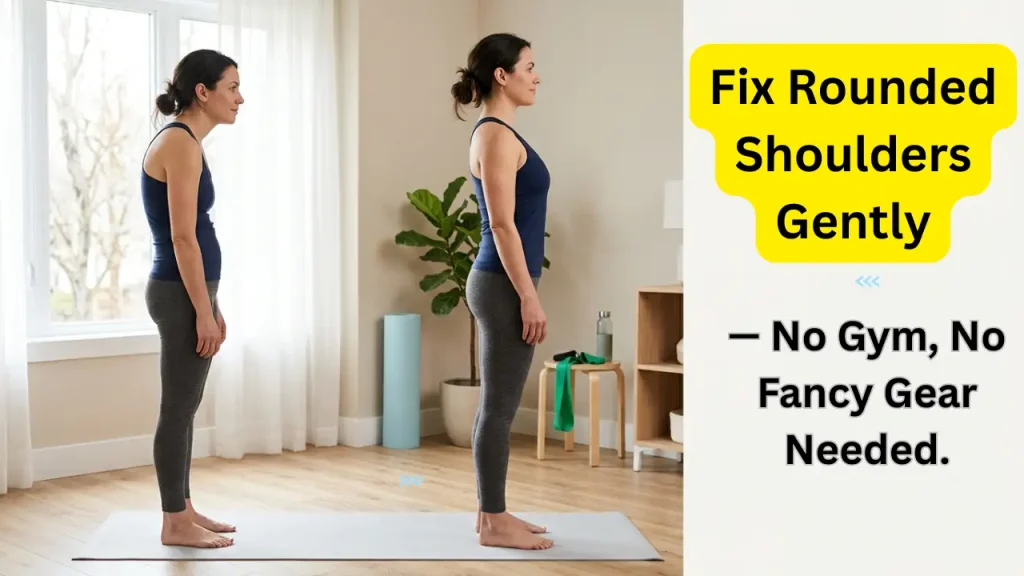
If your shoulders slowly creep forward while you work, scroll, drive, or watch TV, you’re not alone.
You may notice a tight chest, a stiff neck, aching between your shoulder blades, or that familiar “hunched” look in the mirror. Maybe you keep reminding yourself to “sit up straight,” only to slump again five minutes later.
That doesn’t mean you’re lazy. It means your body has adapted to the positions you repeat most often.
The good news? You can improve rounded shoulders with simple posture correction exercises, better movement habits, and a little patience. You don’t need a gym membership, expensive equipment, or a 60-minute daily routine. A few minutes of focused work can make a real difference when you repeat it consistently.
Research on exercise-based posture programs suggests that stretching, shoulder-strengthening exercises, neck exercises, and upper-back mobility work may improve forward-head posture, rounded shoulders, and related discomfort.
This guide walks you through the exercises, explains how to perform them safely, and gives you a realistic routine you can actually follow.
Table of Contents
What Causes Rounded Shoulders?
Rounded shoulders usually develop when your shoulders rest forward for long periods — and honestly, that’s exactly where posture correction exercises come in. They help you undo exactly those patterns that slowly pull you out of alignment.
Think about a typical day:
You sit at a laptop for 6–8 hours.
You look down at your phone dozens of times.
You drive with your arms reaching forward.
You watch television curled into the corner of a sofa.
You rarely move your upper back through its full range.
Your body gets very good at whatever you do repeatedly. If you spend most of the day reaching forward, the muscles at the front of your chest and shoulders tighten up. The muscles around your shoulder blades go quiet and lose their strength. That simple imbalance — tight front, weak back — is the most common reason people want to fix rounded shoulders, and it’s also why consistent posture correction exercises work so well.
Your body literally adapts to the shape you hold most. Over time, that forward curve becomes your body’s “default” position. Your neck may also drift forward just to keep your eyes level, creating that forward-head look where your ears sit ahead of your shoulders instead of comfortably above them.
Here’s what surprised me most: this doesn’t happen because your body is “broken.” It’s almost always a movement and habit problem. Your body is just doing what it was trained to do — by you, all day long.
From what I’ve seen, rounded shoulders rarely come from just one thing. It’s usually several small changes stacking up:
- Tight, shortened chest muscles pulling you forward
- Stiff upper back that can’t easily extend or rotate
- Weak or poorly coordinated muscles between your shoulder blades that should be holding you up
- That forward-head position adding extra load to your neck and shoulders
- Tightness that spreads across your whole upper shoulder and neck area
- Poor endurance — you slump within minutes because your muscles get tired
And here’s something most people don’t mention: posture isn’t supposed to look perfectly stiff all day long. Your body is meant to move, bend, reach, and rest. The real problem isn’t sitting or leaning — it’s staying frozen in one uncomfortable position for hours, then realizing you can’t easily move back. That’s exactly where building awareness and doing simple posture correction exercises consistently helps you reclaim control, so you can naturally fix rounded shoulders without having to force yourself upright every minute of the day.problem is staying in one uncomfortable position for hours and having limited control when you try to change it.
You may also like: Building a Home Gym Setup That Actually Fits Your Life
Can You Really Fix Rounded Shoulders?
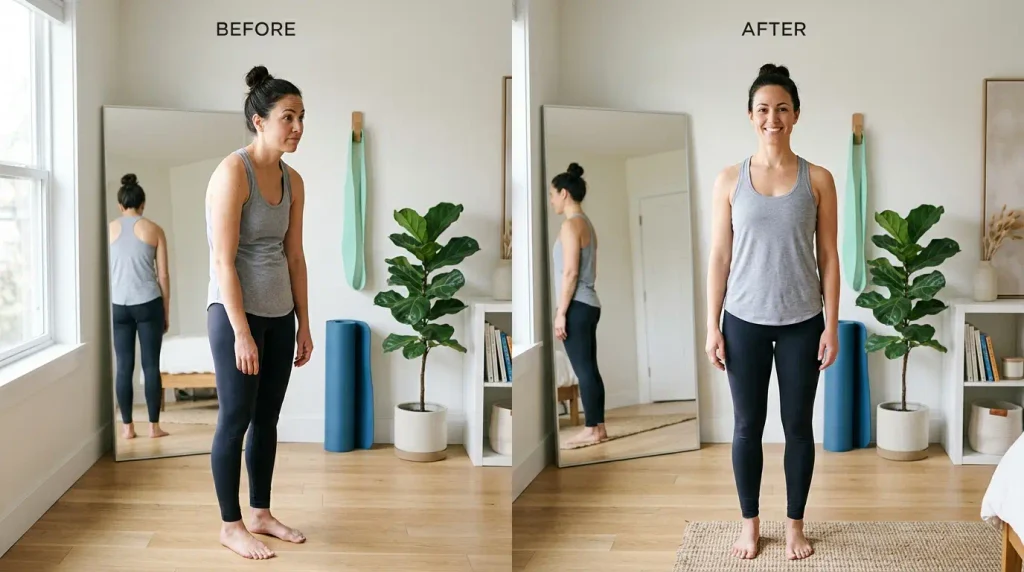
You can absolutely improve rounded shoulders, especially when the problem comes from daily habits, tight muscles, and lost movement control — and that’s exactly where posture correction exercises shine brightest. They’re your most practical tool to gently fix rounded shoulders without strain or force.
That doesn’t mean every shoulder shape can be completely changed. Structural differences, arthritis, spinal curves, past injuries, or long-term health conditions may need a professional’s eye. But even then, posture correction exercises can still help you move more freely, feel stronger, and carry yourself with greater ease. You might not change every detail — but you can almost always improve comfort, strength, and awareness.
The most reliable path forward combines three things that work together far better than any single trick:
- Stretch the tight, restricted areas — especially your chest and front shoulders — to make room for movement.
- Strengthen your upper back, neck, and shoulder-supporting muscles with simple posture correction exercises, so your body knows how to hold itself upright comfortably.
- Shift the daily positions and habits that keep pulling you forward, so you stop undoing all your progress by noon.
Research backs this up too. A 2018 study looked at stretching the chest and strengthening shoulders with simple resistance — and found that combining mobility work with strengthening exercises was far more effective than only stretching or only pulling. The science is clear: you can’t just pull your shoulders back; you need to loosen the tight parts AND rebuild strength where it’s needed most. That’s the honest, proven way to fix rounded shoulders for good.
And no — forcing your shoulders back all day long is NOT the answer.
That usually creates tension in your neck and upper back. You might look “straight” for a minute or two, but you’ll feel tight, exhausted, and eventually slump right back down. It’s like holding a heavy weight forever — unsustainable.
The real goal isn’t stiff, military-perfect posture. It’s giving your body the support, flexibility, and awareness to naturally sit and stand where it belongs — so good posture feels easy, not forced. That’s exactly what consistent posture correction exercises help you build.
Start With a Quick Posture Check
Before exercising, take 30 seconds to notice how you naturally stand.
Stand sideways in front of a mirror. Don’t force your body into position. Just relax.
Look for:
- Is your head noticeably in front of your shoulders?
- Do your shoulders sit far ahead of your hips?
- Are your palms facing backward instead of toward your thighs?
- Does your upper back look more rounded than usual?
- Do you feel one shoulder sitting higher?
- Can you raise your arms overhead without arching your lower back?
- Does one side feel tighter or weaker?
This isn’t a medical diagnosis. It’s simply a starting point.
Take a side photo if you want to track progress. Use the same room, clothing, camera height, and relaxed position every few weeks. Don’t take a photo while aggressively pulling your shoulders back. That only shows what you can force for two seconds.
Chest and Shoulder Stretches
If your chest feels tight, begin here.
Stretching won’t permanently “lengthen” your muscles in one session. It can temporarily reduce stiffness and help you move more comfortably. Pair it with strengthening so your body can use that new range of motion.
1. Doorway Chest Stretch
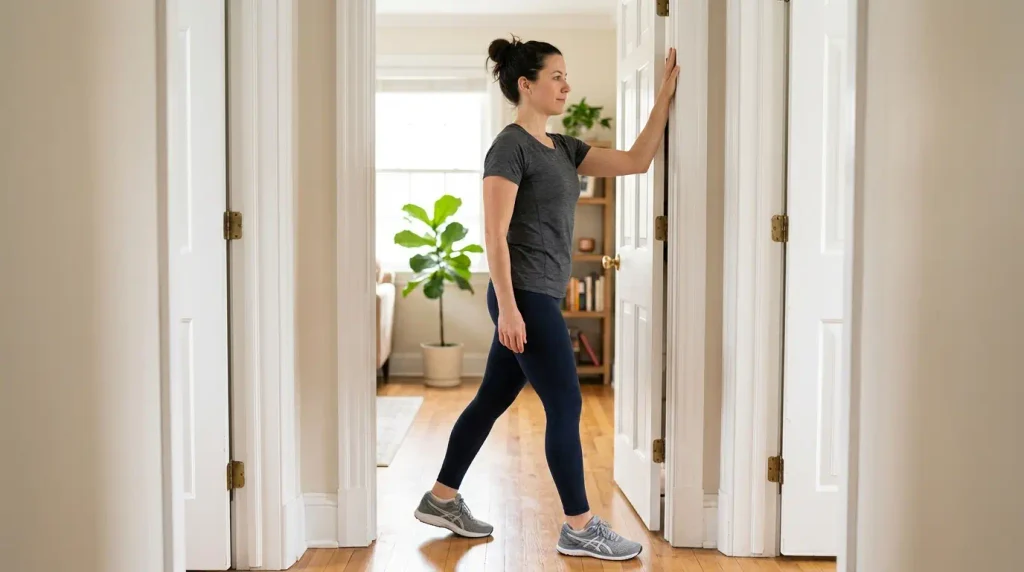
This is one of the simplest exercises for tight chest muscles.
How to do it:
- Stand in an open doorway.
- Place one forearm against the door frame.
- Keep your elbow around shoulder height.
- Step forward slowly with the opposite foot.
- Stop when you feel a mild stretch across your chest and the front of your shoulder.
- Keep your ribs relaxed. Don’t arch your lower back.
- Breathe slowly for 20–30 seconds.
- Switch sides.
Complete 2 rounds per side.
You can also change the elbow position slightly higher or lower. Different angles may change where you feel the stretch.
The stretch should feel mild to moderate. It shouldn’t cause sharp pain, numbness, tingling, or a burning sensation down your arm.
If your shoulder is irritated, lower your arm or reduce the step forward. A huge stretch is not a better stretch.
2. Two-Arm Doorway Stretch
If both sides feel equally tight, try this version.
- Place both forearms on the sides of a doorway.
- Keep your elbows bent.
- Step forward gently.
- Keep your chin level and shoulders away from your ears.
- Hold for 20–30 seconds.
- Repeat twice.
Don’t force your chest forward by flaring your ribs. Stay relaxed.
3. Upper-Back Extension Over a Chair
Your upper back can become stiff after long periods of sitting. This gentle movement helps you extend through the thoracic spine.
- Sit on a chair with a firm back.
- Place your hands behind your head or across your chest.
- Keep your feet flat on the floor.
- Lean your upper back gently over the top of the chair.
- Move from the middle of your back, not from your lower back.
- Return to the starting position.
Do 8–10 slow repetitions.
Don’t throw your head backward. Keep your neck comfortable and your movement controlled.
Exercises for the Upper Back
Stretching alone won’t teach your shoulders to stay in a better position. Your upper-back muscles need practice too.
You’re not trying to squeeze your shoulder blades together as hard as possible. You’re teaching them to move smoothly and support your shoulders without making your neck tense.
4. Shoulder Blade Squeezes
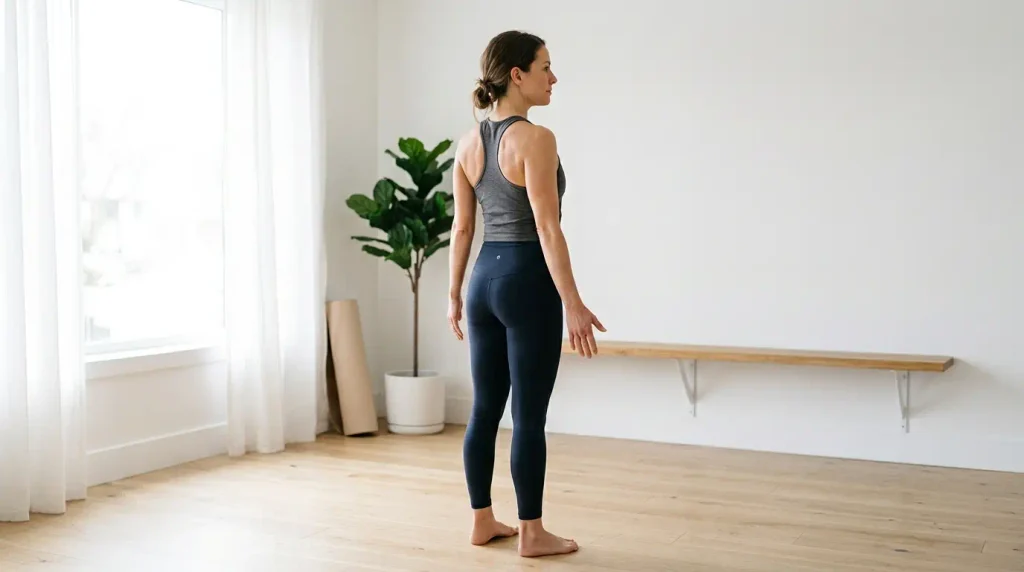
This is a great beginner exercise.
- Sit or stand comfortably.
- Let your arms rest by your sides.
- Keep your chin level.
- Gently draw your shoulder blades back and slightly down.
- Imagine placing them into your back pockets.
- Hold for 3–5 seconds.
- Relax completely.
Do 10–15 repetitions for 2–3 sets.
Avoid lifting your shoulders toward your ears. If your upper traps start burning, reduce the effort.
You should feel the muscles around the shoulder blades working. You shouldn’t feel a pinch in the front of the shoulder.
5. Wall Angels or Wall Slides
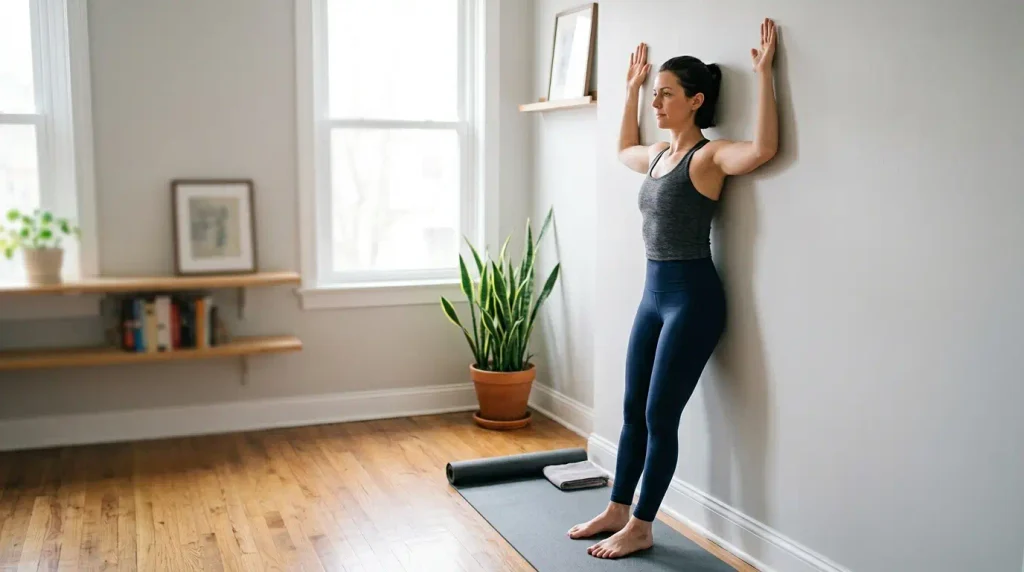
Wall slides help you practise shoulder movement while keeping your upper body aligned.
- Stand with your back near a wall.
- Place your feet 10–20 centimetres away from the wall.
- Keep your ribs relaxed.
- Bend your elbows into a “W” position.
- Place your arms against the wall if comfortable.
- Slowly slide your arms upward.
- Go only as high as you can without shrugging or arching your lower back.
- Lower your arms slowly.
Complete 8–12 repetitions for 2 sets.
Your hands and elbows don’t need to stay perfectly glued to the wall. That’s not the main goal. Smooth movement matters more.
If your shoulder hurts, make the movement smaller. If you can’t raise your arms very far, start with a comfortable range.
6. Prone Y-T-W Raises
This exercise targets several upper-back muscles. It’s more challenging than shoulder blade squeezes, so use small movements.
Lie face down on a mat or firm bed. Keep your forehead supported on a folded towel.
Start with your arms by your sides.
For the “T” position:
- Extend your arms out to the sides.
- Keep your thumbs pointing upward.
- Lift your hands slightly.
- Squeeze gently around your shoulder blades.
- Lower slowly.
For the “Y” position:
- Move your arms overhead into a wide Y shape.
- Keep your thumbs pointing upward.
- Lift your arms only a few centimetres.
- Keep your neck relaxed.
Do 6–10 repetitions of each position.
You can skip the “W” position at first if it feels uncomfortable. Your forehead stays supported. Don’t lift your chest high off the floor or crank your neck upward.
7. Prone Cobra
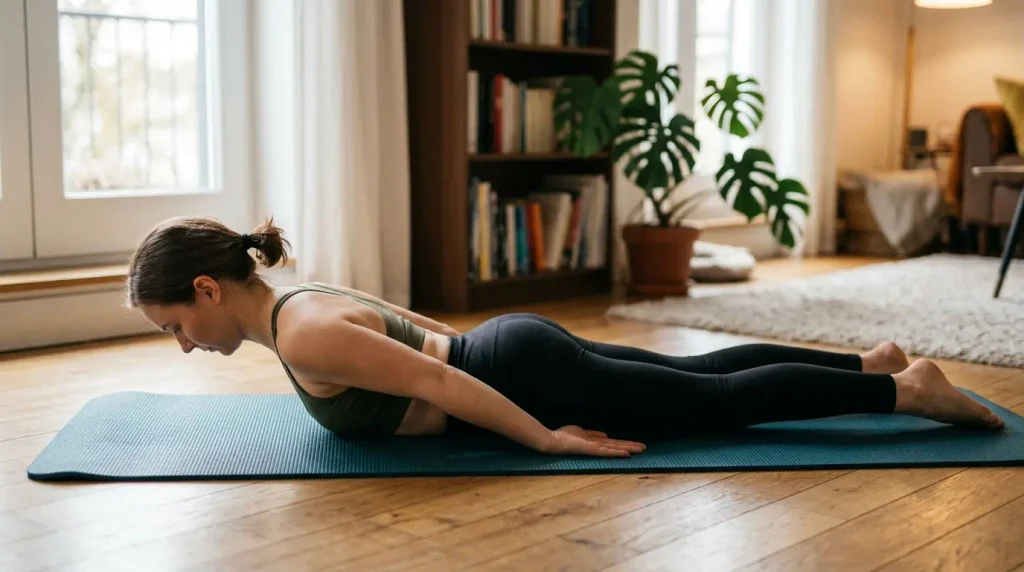
The prone cobra strengthens the upper back and encourages better shoulder control.
- Lie face down.
- Place your arms beside your body.
- Turn your palms toward your thighs.
- Keep your forehead close to the floor.
- Gently draw your shoulder blades back and down.
- Lift your hands and upper chest slightly.
- Hold for 3–5 seconds.
- Lower slowly.
Start with 6–10 repetitions.
The movement should be small. Really small.
If you feel most of the work in your lower back, lower your chest and tighten your abdominal muscles gently. If you feel neck pain, keep your head down and reduce the lift. Use an exercise mat for prone cobra and floor exercises so your back and knees feel more comfortable
Neck Exercises for Forward-Head Posture
Rounded shoulders and forward-head posture often appear together. When your head stays forward, your neck and upper-back muscles work harder to support it.
You don’t need to yank your head backward. Gentle control works better.
8. Chin Tucks
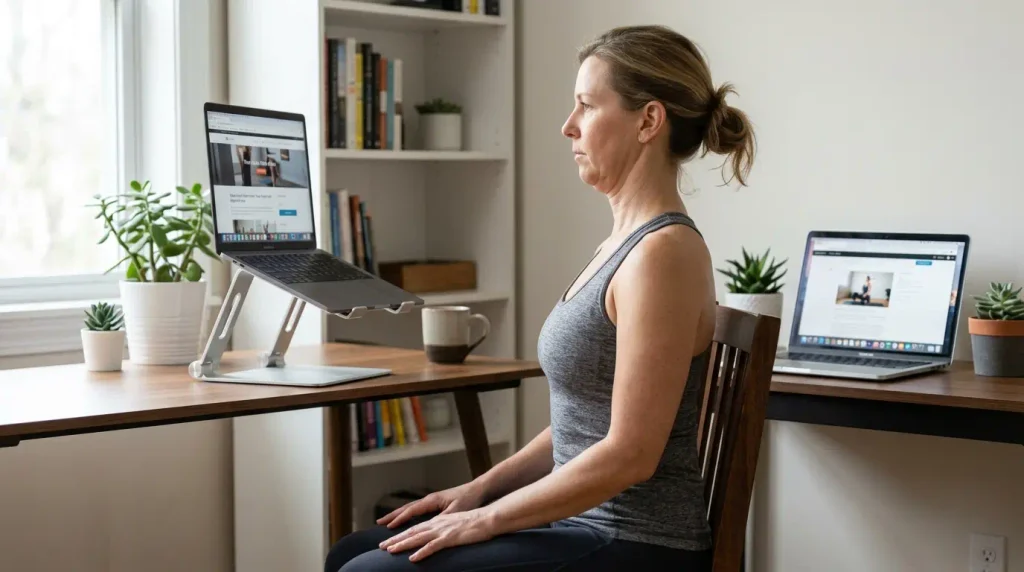
Chin tucks are also called cervical retractions.
- Sit or stand tall.
- Look straight ahead.
- Slide your head backward without looking up or down.
- Imagine making a small double chin.
- Hold for 3–5 seconds.
- Relax.
Repeat 8–12 times.
The movement is horizontal. Don’t push your chin down toward your chest.
You may feel a light stretch at the base of your skull or gentle work in the front of your neck. You shouldn’t feel sharp pain, dizziness, or pressure.
Try 5–10 repetitions during work breaks instead of doing 100 repetitions once a week. That’s the point. Frequent, easy practice.
9. Deep Neck Flexor Nod
This is a gentle option you can do lying down.
- Lie on your back with your knees bent.
- Use a thin pillow if needed.
- Keep your face pointing toward the ceiling.
- Make a small nod, as if saying “yes.”
- Don’t lift your head.
- Hold for 3–5 seconds.
- Relax.
Repeat 8–10 times.
If the front of your neck cramps, make the movement smaller. Your jaw should stay relaxed.
Stop if this causes headaches, dizziness, arm symptoms, or worsening neck pain.
10. Gentle Upper-Trapezius Stretch
The upper trapezius muscles often feel tight when you spend hours at a computer.
- Sit tall.
- Hold the side of the chair with your right hand.
- Tilt your left ear toward your left shoulder.
- Keep your right shoulder down.
- Hold for 20–30 seconds.
- Switch sides.
Don’t pull aggressively on your head. Your hand can rest lightly on your head, but it shouldn’t force the stretch.
Strengthen With a Band
A resistance band gives you more options. A light band is enough for most beginners.
11. Resistance-Band Row
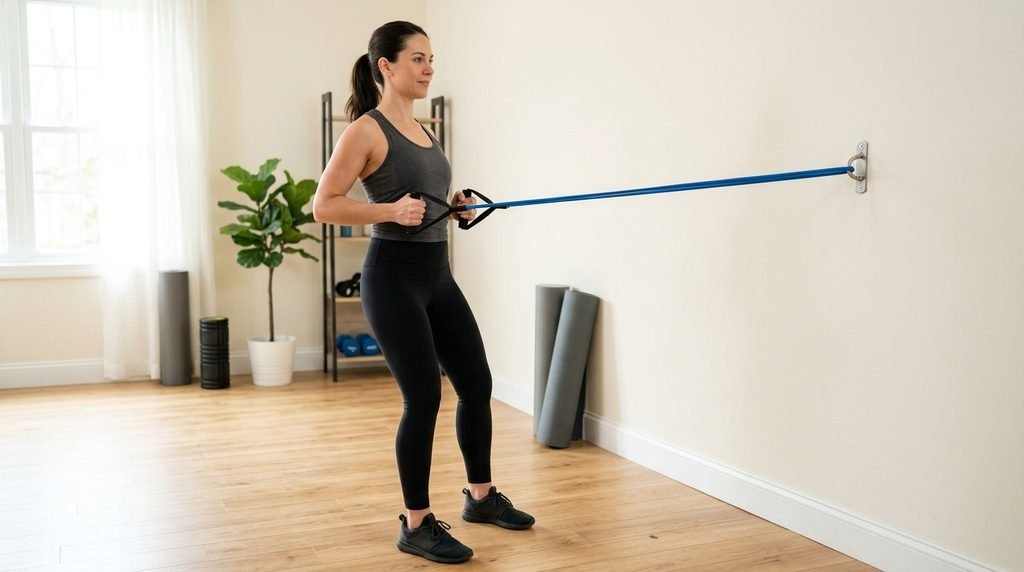
- Anchor the band at chest height.
- Hold one end in each hand.
- Stand or sit tall.
- Pull the band toward your ribs.
- Keep your elbows close to your body.
- Draw your shoulder blades back and down.
- Pause briefly.
- Return slowly.
Do 10–15 repetitions for 2–3 sets.
Don’t lean backward to create momentum. Don’t shrug. Keep your wrists straight.
A light resistance band can make rows and pull-aparts more effective without taking up much space.
If you don’t have a resistance band, you can practise the same rowing motion without equipment. Move your elbows backward and imagine pulling a band toward your ribs. It won’t provide the same resistance, but it helps you learn the movement.
12. Band Pull-Aparts
- Hold a light resistance band in front of your chest.
- Keep your arms almost straight.
- Pull the band apart by moving your hands outward.
- Stop when your arms form a straight line with your body.
- Keep your ribs down and shoulders relaxed.
- Return slowly.
Do 8–15 repetitions.
Use a light band. Heavy resistance usually turns this into a shrugging competition. That’s not what you want.
A Simple Daily Routine
Here’s a plan that doesn’t require you to disappear into the gym.
Five-minute beginner routine
Do this once per day:
- Chin tucks — 10 repetitions.
- Doorway chest stretch — 20–30 seconds per side.
- Shoulder blade squeezes — 15 repetitions.
- Wall slides — 8–10 repetitions.
- Upper-back extension over a chair — 8 repetitions.
Move slowly. Keep the effort comfortable.
Three-day strengthening routine
Do this three or four days per week:
- Resistance-band rows — 2–3 sets of 10–15.
- Wall slides — 2 sets of 8–12.
- Prone cobra — 2 sets of 6–10.
- Chin tucks — 2 sets of 10.
- Doorway chest stretch — 2 rounds per side.
On busy days, do only the doorway stretch and 10 shoulder blade squeezes. That still counts.
Five consistent minutes will beat one exhausting workout you abandon after seven days.
Fix Your Desk Setup
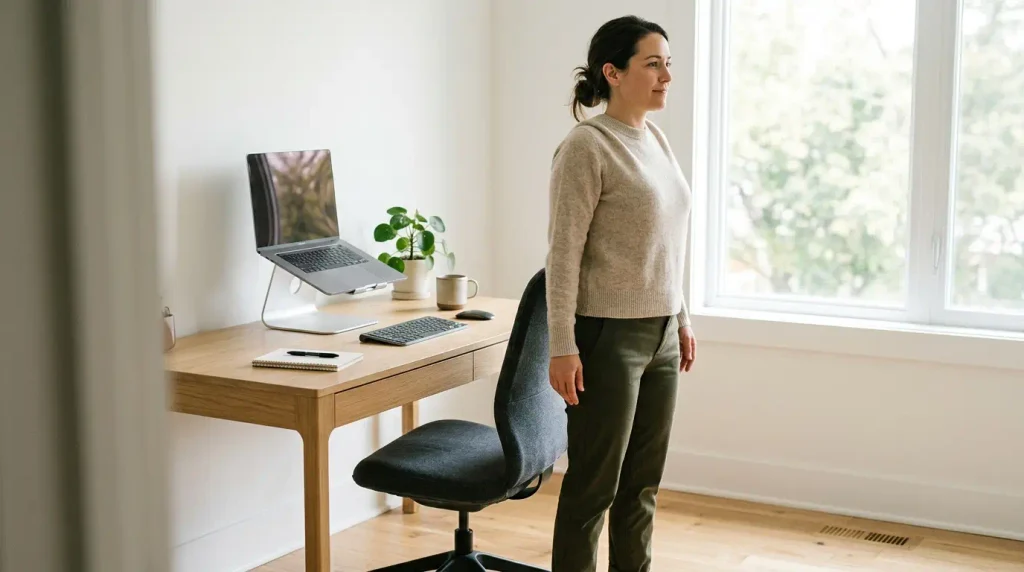
Exercises help, but your daily setup matters a lot.
Try these changes:
- Keep the top third of your monitor around eye level.
- Place the screen directly in front of you.
- Keep your elbows close to your body.
- Aim for roughly 90 degrees at your elbows.
- Rest your feet flat on the floor.
- Keep your keyboard and mouse close enough that you don’t reach forward.
- Use a chair that supports your lower back.
- Let your shoulders stay relaxed.
Don’t chase one “perfect” posture. Change positions regularly.
Set a timer for every 45–60 minutes. Stand up, walk for a minute, roll your shoulders, or stretch your chest. Even a short movement break is better than staying frozen at your desk for four straight hours.
Your body doesn’t need perfect alignment. It needs variety.
Improve Your Phone Habits
Phones make forward-head posture incredibly easy.
You look down. Your shoulders round. Your head moves forward. Then you stay there for 20 minutes watching short videos. We’ve all done it.
Try this:
- Hold your phone closer to eye level.
- Support your elbows on a desk or armrest.
- Switch hands regularly.
- Take frequent visual and movement breaks.
- Avoid using your phone in one fixed position for long periods.
- Stretch your chest after extended scrolling.
You don’t need to stop using your phone. Just stop giving your neck the same position for hours every day.
Sleeping and Rounded Shoulders
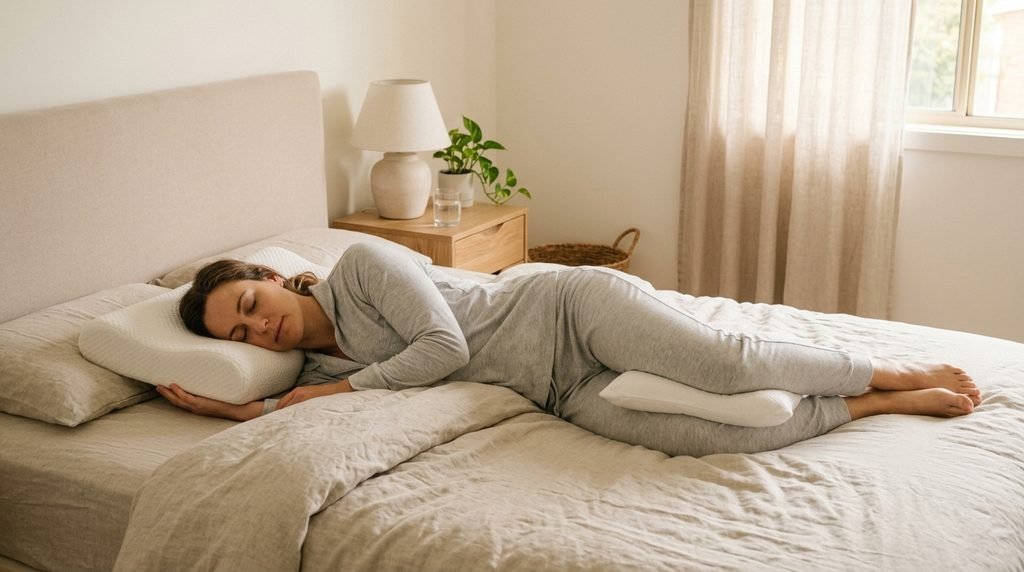
Sleep position honestly plays a bigger role than most folks realize — and yes, it can leave you stiffer in the morning — but it’s almost never the only thing behind rounded shoulders.
Side sleeping works great, as long as your pillow keeps your head nice and level with your spine. If your head sinks down toward the bed, your pillow’s too thin. If it’s propped way up, it’s too thick. Either way, your neck and shoulders hang in an awkward spot all night long — exactly what posture correction exercises help undo when morning comes.
Back sleeping is usually the gentlest choice. Just pick a pillow that supports your neck naturally, not one that shoves your chin up toward your chest. That way your shoulders can settle back and relax, instead of being pushed forward all night.
Try to avoid sleeping on your stomach, if you can. It twists your neck around for hours at a time. If you keep waking up with that one-sided neck ache or tighter shoulder, this position might be quietly making it harder to fix rounded shoulders long-term.
And hey — don’t stress if you toss and turn or can’t control exactly how you sleep. None of us stay perfectly still all night anyway. Just get your pillow height right, keep your mattress comfortable, and — most importantly — keep up those simple daily habits and posture correction exercises. That’s where the real change happens.
Common Mistakes to Avoid
Forcing your shoulders back
Pulling your shoulders back as hard as possible creates tension and fatigue. Use gentle control instead.
Doing only chest stretches
A stretch may feel good for a few minutes, but your body also needs upper-back and shoulder-strengthening work.
Using too much resistance
Heavy bands make people shrug, lean, and swing. Start light. Make every repetition clean.
Ignoring pain
Muscle effort is normal. Sharp pain, joint pinching, numbness, tingling, weakness, or symptoms spreading down the arm are not signs to push through.
Expecting results in three days
You may feel temporary relief quickly, but lasting changes usually require repeated practice over several weeks.
Treating posture as a static position
Standing stiffly with your chest pushed out isn’t healthy posture. Move, shift, walk, and change positions.
When to See a Professional
See a physiotherapist, doctor, or other qualified healthcare professional if:
- Your pain is severe or getting worse.
- You have numbness or tingling in your arm or hand.
- You notice new weakness or dropping objects.
- Your shoulder movement is suddenly limited.
- You have pain after a fall, accident, or injury.
- You experience dizziness, severe headaches, or balance problems.
- Your symptoms continue despite several weeks of gentle exercise.
- One shoulder changes position suddenly.
- You have chest pain or trouble breathing.
Exercise should not make nerve symptoms worse. Start with a small range of motion, move slowly, and stop if symptoms travel into your arm or hand.
Read Also: Pre Workout Nutrition: What to Eat Before the Gym (Plus Where Thavage Pre Workout Fits In)
What Results Should You Expect?
EEveryone responds differently, so please don’t treat a six-week timeline like some rigid promise you have to meet. Posture correction exercises work, but they work at your pace — not a schedule someone else wrote.
That first week? Everything might feel a little odd. You’ll feel muscles waking up that you’ve completely ignored. You’ll catch yourself slumping and remember — oh right! — then forget again 50 times that same day. That’s not failure. That’s just how habits work. Give yourself grace.
By week two or three, things start shifting. Those chest stretches get easier. Your shoulders move more freely. You might realize you’re sitting comfortably longer without that familiar tightness pulling you forward. That’s your body starting to fix rounded shoulders one small step at a time.
Around weeks four through six — if you’ve been consistent — you’ll notice something wonderful. Your shoulders naturally want to sit back and down. You can stand or sit longer without fatigue. Your body is building real control, not just holding a pose. Research backs this up too: consistent, structured movement really does improve posture and function — though exactly how fast depends on your starting point, habits, and what created those imbalances in the first place.
Here’s the honest part: the goal was never to force your body into some perfect shape. It’s to build enough flexibility, strength, and awareness that good posture just happens — naturally, without you fighting it all day.
And let’s be real: you’ll skip days. You’ll spend an entire Saturday hunched over your screen. You’ll scroll in bed with your chin tucked down and your shoulders rounded.
That’s okay. Truly.
No big dramatic restart needed. Just do 10 gentle chin tucks and one quick chest stretch, and pick right back up. Posture correction exercises aren’t about perfection — they’re about showing up, most days, and being kind to yourself on the rest.
Frequently Asked Questions
What are the best posture correction exercises for rounded shoulders?
Start with doorway chest stretches, chin tucks, shoulder blade squeezes, wall slides, and resistance-band rows. This combination addresses chest tightness, forward-head posture, and weak or poorly coordinated upper-back muscles.
How long does posture correction exercises take to correct rounded shoulders?
Mild posture problems may feel better within a few weeks of consistent practice. Visible or long-term changes can take several months. The timeline depends on your habits, strength, mobility, pain level, and whether a structural condition is involved.
Can I fix rounded shoulders without equipment?
Yes. Doorway stretches, chin tucks, wall slides, shoulder blade squeezes, upper-back extensions, and prone cobra exercises require little or no equipment.
Are rounded shoulders caused by weak back muscles?
Sometimes, but not always. Tight chest muscles, limited upper-back movement, forward-head posture, poor endurance, and daily habits can all contribute. The most useful plan usually combines stretching, strengthening, and regular movement breaks.
Should I pull my shoulders back all day?
No. Constantly forcing your shoulders backward can create neck and upper-back tension. Practise gentle shoulder-blade control, keep your ribs relaxed, and change positions regularly.
Can posture correction exercises reduce neck pain?
They may help some people, especially when neck pain is connected to forward-head posture, muscle weakness, or reduced upper-back mobility. Neck pain has many possible causes, so persistent or severe symptoms should be assessed by a healthcare professional.
How often should I do posture exercises?
A five-minute routine daily is a good starting point. Strength exercises can be performed three or four days per week, while gentle mobility and awareness exercises can be used more often if they feel comfortable.
Are wall angels good for rounded shoulders?
Wall slides can improve shoulder mobility and control. You don’t need to force your hands and elbows against the wall. Use a comfortable range and avoid shrugging or arching your lower back.
Can sleeping position cause rounded shoulders?
Sleeping position usually isn’t the only cause, but it can contribute to morning stiffness and neck discomfort. A pillow that keeps your head level with your spine may help. Daily sitting, phone use, and limited movement are often bigger factors.
What’s the fastest way to improve posture?
The fastest useful approach is to combine a chest stretch, chin tucks, shoulder-blade strengthening, and frequent movement breaks. Don’t rely on a posture brace or force yourself rigidly upright all day.
Are posture braces worth using?
A brace may remind you to notice your posture, but it doesn’t build the strength and control needed for lasting change. If you use one, treat it as a short-term reminder, not a permanent solution.
Can rounded shoulders be permanently fixed?
You can often improve comfort, movement, and posture control. Permanent correction isn’t guaranteed, especially when bone or joint structure, injury, arthritis, or another medical condition is involved. A professional assessment can help identify the real cause.
Your Starting Plan
For the next two weeks, keep it simple:
- Doorway chest stretch — 20–30 seconds per side.
- Chin tucks — 10 repetitions.
- Shoulder blade squeezes — 15 repetitions.
- One movement break every 45–60 minutes.
That’s it.
After two weeks, add wall slides and resistance-band rows if your body feels comfortable.
Don’t try to repair years of sitting in one aggressive workout. Your shoulders didn’t round forward in a single day, and they probably won’t change in one session. Small movements, repeated often, are the boring answer that actually works.
And if an exercise causes sharp pain, numbness, tingling, dizziness, or symptoms that spread into your arm, stop doing it and get professional advice. Your goal is to move better and feel better—not win a battle against your own body.
Also Read: Simple Exercises for Beginners at Home: 6 Easy Moves to Get Started

Fitness Specialist & Former Tactical Trainer
Bal Krishna Poudel has spent more than 19 years in law enforcement organization, and fitness has been at the center of it all. He knows physical conditioning, dynamic strength training, and everyday wellness inside and out. For close to two decades, he taught at official police training centers, getting officers ready for the physical demands of the job—building their endurance and operational fitness. These days, he coaches people in his local community on strength and fitness. At 49, he doesn’t just talk about staying active—he lives it, showing up every day to train and move. He writes for Bodylix, where he shares workouts and nutrition advice that regular readers can actually use, backed by science and built around one goal: helping people stay strong and healthy for the long haul.
